Elementor is active on over 15 million WordPress websites globally — and for good reason. Its visual drag-and-drop interface makes building professional layouts accessible to non-developers while giving experienced WordPress developers a powerful foundation to extend. But there comes a point on almost every serious client project where the built-in widget library simply does not do what you need.
Maybe you need a testimonial slider that pulls from a custom post type. Maybe your client needs a pricing calculator tied to their product database. Maybe you are building a property listing card that displays ACF fields in a specific layout no existing widget supports. When native Elementor widgets and third-party addons cannot do the job, building your own custom Elementor widget is the answer — and it is more approachable than most developers expect.
This guide walks you through the complete process of building a custom Elementor widget from scratch in 2026 — from setting up the plugin structure to registering controls, rendering frontend output, adding styling options, and following best practices for performance and security.
What Is a Custom Elementor Widget?
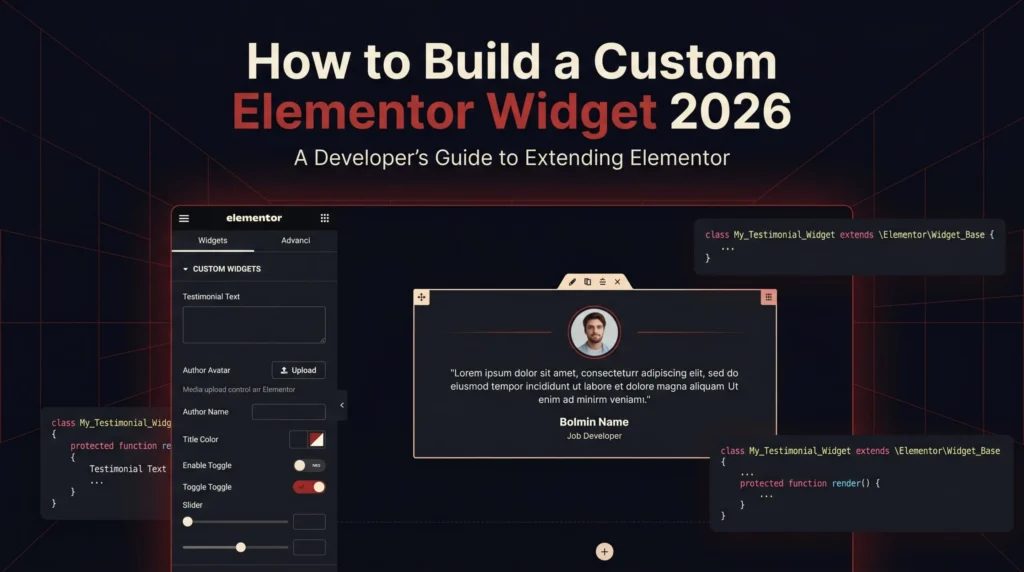
An Elementor widget is a self-contained, draggable component that appears in the Elementor editor panel. Each widget has three layers: controls (the input fields in the editor sidebar that let users configure the widget), render output (the PHP that generates the HTML displayed on the frontend), and styles (CSS that controls how the widget looks, either hardcoded or controlled by style controls in the editor).
Custom Elementor widgets are built by extending Elementor’s \Elementor\Widget_Base class inside a WordPress plugin — not a theme. This keeps your widget available regardless of theme changes and makes it reusable across multiple client sites.
Custom Elementor widgets open the door to advanced features — dynamic content blocks, interactive UI components, API integrations, and third-party data displays. These tools help sites do more than just look good — they create functionality tailored to specific business goals.
When Should You Build a Custom Elementor Widget?
Before writing a single line of code, ask yourself these three questions:
- Does an existing Elementor widget or addon already do this? Check the native Elementor widget library and well-maintained addon packs like Essential Addons or JetElements before building from scratch.
- Can you achieve this with Elementor’s dynamic tags and templates? For displaying ACF fields or WooCommerce data in existing widget layouts, Elementor Pro’s dynamic tags often eliminate the need for a custom widget entirely.
- Is the functionality genuinely unique to this project? Use a plugin when your desired widget is a variation of an existing pattern. Write custom code when the data model, editor workflow, or frontend behaviour is specific to the business.
If the answer to all three is “no existing solution fits” — it is time to build your own.
Step 1: Set Up Your Plugin Structure
Custom Elementor widgets live inside a WordPress plugin — not your theme’s functions.php. If your widget is in the theme and the theme changes, the widget disappears. A plugin persists regardless of what theme the client switches to.
Create the following folder and file structure inside wp-content/plugins/:
arshadws-elementor-widgets/
├── arshadws-elementor-widgets.php
├── css/
│   └── testimonial-widget.css
└── widgets/
    └── class-testimonial-widget.php
Open arshadws-elementor-widgets.php and add the following:
<?php
/**
 * Plugin Name: ArshadWS Elementor Widgets
 * Description: Custom Elementor widgets for client sites by ArshadWebStudio.
 * Version: 1.0.0
 * Author: Arshad Shah
 * Author URI: https://arshadwebstudio.com
 * Requires Plugins: elementor
 */

if ( ! defined( 'ABSPATH' ) ) {
    exit;
}

/**
 * Check Elementor is active before loading widgets.
 */
function arshadws_check_elementor() {
    if ( ! did_action( 'elementor/loaded' ) ) {
        add_action( 'admin_notices', 'arshadws_elementor_notice' );
        return;
    }
    add_action( 'elementor/widgets/register', 'arshadws_register_widgets' );
}
add_action( 'plugins_loaded', 'arshadws_check_elementor' );

/**
 * Admin notice if Elementor is not active.
 */
function arshadws_elementor_notice() {
    echo '<div class="error"><p>'
        . esc_html__( 'ArshadWS Elementor Widgets requires Elementor to be installed and active.', 'arshadws-widgets' )
        . '</p></div>';
}

/**
 * Register widget styles.
 */
function arshadws_register_widget_styles() {
    wp_register_style(
        'arshadws-testimonial-widget',
        plugin_dir_url( __FILE__ ) . 'css/testimonial-widget.css',
        array(),
        '1.0.0'
    );
}
add_action( 'wp_enqueue_scripts', 'arshadws_register_widget_styles' );

/**
 * Register custom widgets with Elementor.
 */
function arshadws_register_widgets( $widgets_manager ) {
    require_once __DIR__ . '/widgets/class-testimonial-widget.php';
    $widgets_manager->register( new \ArshadWS_Testimonial_Widget() );
}
Step 2: Create the Widget Class
Inside widgets/class-testimonial-widget.php, create your widget class. We are building a Testimonial Widget — one of the most requested custom widgets on client sites — as a practical real-world example.
<?php

if ( ! defined( 'ABSPATH' ) ) {
    exit;
}

class ArshadWS_Testimonial_Widget extends \Elementor\Widget_Base {

    /**
     * Unique widget name — lowercase with underscores.
     */
    public function get_name() {
        return 'arshadws_testimonial';
    }

    /**
     * Widget title shown in the Elementor panel.
     */
    public function get_title() {
        return esc_html__( 'AW Testimonial', 'arshadws-widgets' );
    }

    /**
     * Widget icon — uses eicon- prefix for Elementor icons.
     */
    public function get_icon() {
        return 'eicon-testimonial';
    }

    /**
     * Panel category — 'general' places it in the General section.
     */
    public function get_categories() {
        return array( 'general' );
    }

    /**
     * Keywords for the panel search.
     */
    public function get_keywords() {
        return array( 'testimonial', 'review', 'quote', 'arshadws' );
    }

    /**
     * Declare stylesheet dependency — only loads on pages
     * where this widget is used.
     */
    public function get_style_depends() {
        return array( 'arshadws-testimonial-widget' );
    }
Step 3: Register Content Controls
Controls are the input fields that appear in the Elementor editor sidebar. They are registered inside the register_controls() method. Add this method inside your widget class, after get_style_depends():
    protected function register_controls() {

        // ── CONTENT TAB ──────────────────────────────────────────────────

        $this->start_controls_section(
            'content_section',
            array(
                'label' => esc_html__( 'Testimonial Content', 'arshadws-widgets' ),
                'tab'   => \Elementor\Controls_Manager::TAB_CONTENT,
            )
        );

        // Quote
        $this->add_control(
            'quote',
            array(
                'label'   => esc_html__( 'Quote', 'arshadws-widgets' ),
                'type'    => \Elementor\Controls_Manager::TEXTAREA,
                'rows'    => 5,
                'default' => esc_html__( 'This service completely transformed our business. Highly recommended.', 'arshadws-widgets' ),
            )
        );

        // Author name
        $this->add_control(
            'author_name',
            array(
                'label'   => esc_html__( 'Author Name', 'arshadws-widgets' ),
                'type'    => \Elementor\Controls_Manager::TEXT,
                'default' => esc_html__( 'John Smith', 'arshadws-widgets' ),
            )
        );

        // Author role / company
        $this->add_control(
            'author_role',
            array(
                'label'   => esc_html__( 'Role / Company', 'arshadws-widgets' ),
                'type'    => \Elementor\Controls_Manager::TEXT,
                'default' => esc_html__( 'CEO, Acme Corp', 'arshadws-widgets' ),
            )
        );

        // Author photo
        $this->add_control(
            'author_image',
            array(
                'label'   => esc_html__( 'Author Photo', 'arshadws-widgets' ),
                'type'    => \Elementor\Controls_Manager::MEDIA,
                'default' => array(
                    'url' => \Elementor\Utils::get_placeholder_image_src(),
                ),
            )
        );

        // Star rating
        $this->add_control(
            'star_rating',
            array(
                'label'   => esc_html__( 'Star Rating (1-5)', 'arshadws-widgets' ),
                'type'    => \Elementor\Controls_Manager::NUMBER,
                'min'     => 1,
                'max'     => 5,
                'step'    => 1,
                'default' => 5,
            )
        );

        $this->end_controls_section();
The most commonly used Elementor control types are:
TEXT— Single line text inputTEXTAREA— Multi-line text inputNUMBER— Numeric input with min, max, and stepSELECT— Dropdown with defined optionsSWITCHER— Toggle on/offMEDIA— Image picker from the media libraryURL— URL input with link target optionsCOLOR— Colour picker tied to Elementor’s global colour paletteICONS— Icon picker from Font AwesomeWYSIWYG— Full rich text editor
Step 4: Add Style Controls
Style controls live in TAB_STYLE and give users full visual control without touching code. Add this section directly after the content section’s end_controls_section() — still inside register_controls():
        // ── STYLE TAB ────────────────────────────────────────────────────

        $this->start_controls_section(
            'style_section',
            array(
                'label' => esc_html__( 'Testimonial Style', 'arshadws-widgets' ),
                'tab'   => \Elementor\Controls_Manager::TAB_STYLE,
            )
        );

        // Quote text colour
        $this->add_control(
            'quote_color',
            array(
                'label'     => esc_html__( 'Quote Colour', 'arshadws-widgets' ),
                'type'      => \Elementor\Controls_Manager::COLOR,
                'selectors' => array(
                    '{{WRAPPER}} .arshadws-quote' => 'color: {{VALUE}};',
                ),
            )
        );

        // Quote typography
        $this->add_group_control(
            \Elementor\Group_Control_Typography::get_type(),
            array(
                'name'     => 'quote_typography',
                'selector' => '{{WRAPPER}} .arshadws-quote',
            )
        );

        // Author name colour
        $this->add_control(
            'author_name_color',
            array(
                'label'     => esc_html__( 'Author Name Colour', 'arshadws-widgets' ),
                'type'      => \Elementor\Controls_Manager::COLOR,
                'selectors' => array(
                    '{{WRAPPER}} .arshadws-author-name' => 'color: {{VALUE}};',
                ),
            )
        );

        // Box background colour
        $this->add_control(
            'box_background',
            array(
                'label'     => esc_html__( 'Background Colour', 'arshadws-widgets' ),
                'type'      => \Elementor\Controls_Manager::COLOR,
                'selectors' => array(
                    '{{WRAPPER}} .arshadws-testimonial-wrap' => 'background-color: {{VALUE}};',
                ),
            )
        );

        // Box padding — responsive (desktop / tablet / mobile)
        $this->add_responsive_control(
            'box_padding',
            array(
                'label'      => esc_html__( 'Padding', 'arshadws-widgets' ),
                'type'       => \Elementor\Controls_Manager::DIMENSIONS,
                'size_units' => array( 'px', 'em', '%' ),
                'selectors'  => array(
                    '{{WRAPPER}} .arshadws-testimonial-wrap' => 'padding: {{TOP}}{{UNIT}} {{RIGHT}}{{UNIT}} {{BOTTOM}}{{UNIT}} {{LEFT}}{{UNIT}};',
                ),
            )
        );

        // Box border radius
        $this->add_control(
            'box_border_radius',
            array(
                'label'      => esc_html__( 'Border Radius', 'arshadws-widgets' ),
                'type'       => \Elementor\Controls_Manager::SLIDER,
                'size_units' => array( 'px' ),
                'range'      => array(
                    'px' => array( 'min' => 0, 'max' => 40 ),
                ),
                'selectors'  => array(
                    '{{WRAPPER}} .arshadws-testimonial-wrap' => 'border-radius: {{SIZE}}{{UNIT}};',
                ),
            )
        );

        $this->end_controls_section();

    } // end register_controls()
Step 5: Render the Frontend Output
The render() method generates the HTML visitors see on the frontend. This version uses a single $output string built with echo — no inline PHP and HTML switching — which eliminates rendering issues when the code is copy-pasted across different environments.
Add this method inside your widget class, after register_controls():
protected function render() {
$settings = $this->get_settings_for_display();
$quote = $settings['quote'];
$author_name = $settings['author_name'];
$author_role = $settings['author_role'];
$image = $settings['author_image'];
$rating = (int) $settings['star_rating'];
// Don't render an empty widget in the editor
if ( empty( $quote ) ) {
return;
}
$output = '<div class="arshadws-testimonial-wrap">';
// ── Star Rating ───────────────────────────────────────────────
if ( $rating ) {
$aria_label = sprintf( '%d out of 5 stars', $rating );
$output .= '<div class="arshadws-stars" aria-label="' . esc_attr( $aria_label ) . '">';
for ( $i = 1; $i <= 5; $i++ ) {
$star_class = ( $i <= $rating ) ? 'filled' : 'empty';
$output .= '<span class="arshadws-star ' . esc_attr( $star_class ) . '">★</span>';
}
$output .= '</div>';
}
// ── Quote ─────────────────────────────────────────────────────
$output .= '<blockquote class="arshadws-quote">';
$output .= wp_kses_post( $quote );
$output .= '</blockquote>';
// ── Author Row ────────────────────────────────────────────────
$output .= '<div class="arshadws-author">';
// Author photo
if ( ! empty( $image['url'] ) ) {
$output .= '<div class="arshadws-author-photo">';
$output .= '<img';
$output .= ' src="' . esc_url( $image['url'] ) . '"';
$output .= ' alt="' . esc_attr( $author_name ) . '"';
$output .= ' width="56"';
$output .= ' height="56"';
$output .= ' loading="lazy">';
$output .= '</div>';
}
// Author name and role
$output .= '<div class="arshadws-author-info">';
if ( ! empty( $author_name ) ) {
$output .= '<strong class="arshadws-author-name">';
$output .= esc_html( $author_name );
$output .= '</strong>';
}
if ( ! empty( $author_role ) ) {
$output .= '<span class="arshadws-author-role">';
$output .= esc_html( $author_role );
$output .= '</span>';
}
$output .= '</div>'; // .arshadws-author-info
$output .= '</div>'; // .arshadws-author
$output .= '</div>'; // .arshadws-testimonial-wrap
// Single echo at the end — all values escaped above
echo $output; // phpcs:ignore WordPress.Security.EscapeOutput.OutputNotEscaped
} // end render()
} // end class ArshadWS_Testimonial_Widget
Always use the correct escaping function for each type of output:
esc_html()— plain text outputesc_url()— URLs and image sourcesesc_attr()— HTML attribute valueswp_kses_post()— rich text that may contain allowed HTML tags
Step 6: Add the Widget CSS
Create css/testimonial-widget.css inside your plugin folder. Because you declared this file in get_style_depends() in Step 2, Elementor will only load it on pages where your widget is actually used — keeping all other pages fast.
/* ── ArshadWS Testimonial Widget ─────────────── */

.arshadws-testimonial-wrap {
    padding: 32px;
    background: #ffffff;
    border-radius: 8px;
    border-left: 4px solid #c8432a;
    box-shadow: 0 2px 16px rgba( 0, 0, 0, 0.06 );
}

/* Star rating */
.arshadws-stars {
    display: flex;
    gap: 4px;
    margin-bottom: 16px;
}

.arshadws-star {
    font-size: 18px;
    line-height: 1;
}

.arshadws-star.filled {
    color: #f5a623;
}

.arshadws-star.empty {
    color: #ddd;
}

/* Quote */
.arshadws-quote {
    font-size: 16px;
    line-height: 1.8;
    font-style: italic;
    color: #333;
    margin: 0 0 24px 0;
    padding: 0;
    border: none;
}

/* Author row */
.arshadws-author {
    display: flex;
    align-items: center;
    gap: 14px;
}

/* Author photo */
.arshadws-author-photo img {
    width: 56px;
    height: 56px;
    border-radius: 50%;
    object-fit: cover;
    display: block;
}

/* Author info */
.arshadws-author-info {
    display: flex;
    flex-direction: column;
    gap: 3px;
}

.arshadws-author-name {
    font-size: 15px;
    font-weight: 700;
    color: #111;
    display: block;
}

.arshadws-author-role {
    font-size: 13px;
    color: #777;
    display: block;
}
Step 7: Complete File Reference
Your final plugin has three files. Here is the complete class-testimonial-widget.php in full — the entire widget class from top to bottom, ready to copy and paste:
<?php
if ( ! defined( 'ABSPATH' ) ) {
exit;
}
class ArshadWS_Testimonial_Widget extends \Elementor\Widget_Base {
public function get_name() {
return 'arshadws_testimonial';
}
public function get_title() {
return esc_html__( 'AW Testimonial', 'arshadws-widgets' );
}
public function get_icon() {
return 'eicon-testimonial';
}
public function get_categories() {
return array( 'general' );
}
public function get_keywords() {
return array( 'testimonial', 'review', 'quote', 'arshadws' );
}
public function get_style_depends() {
return array( 'arshadws-testimonial-widget' );
}
protected function register_controls() {
// ── CONTENT TAB ──────────────────────────────────────────────
$this->start_controls_section(
'content_section',
array(
'label' => esc_html__( 'Testimonial Content', 'arshadws-widgets' ),
'tab' => \Elementor\Controls_Manager::TAB_CONTENT,
)
);
$this->add_control(
'quote',
array(
'label' => esc_html__( 'Quote', 'arshadws-widgets' ),
'type' => \Elementor\Controls_Manager::TEXTAREA,
'rows' => 5,
'default' => esc_html__( 'This service completely transformed our business. Highly recommended.', 'arshadws-widgets' ),
)
);
$this->add_control(
'author_name',
array(
'label' => esc_html__( 'Author Name', 'arshadws-widgets' ),
'type' => \Elementor\Controls_Manager::TEXT,
'default' => esc_html__( 'John Smith', 'arshadws-widgets' ),
)
);
$this->add_control(
'author_role',
array(
'label' => esc_html__( 'Role / Company', 'arshadws-widgets' ),
'type' => \Elementor\Controls_Manager::TEXT,
'default' => esc_html__( 'CEO, Acme Corp', 'arshadws-widgets' ),
)
);
$this->add_control(
'author_image',
array(
'label' => esc_html__( 'Author Photo', 'arshadws-widgets' ),
'type' => \Elementor\Controls_Manager::MEDIA,
'default' => array(
'url' => \Elementor\Utils::get_placeholder_image_src(),
),
)
);
$this->add_control(
'star_rating',
array(
'label' => esc_html__( 'Star Rating (1-5)', 'arshadws-widgets' ),
'type' => \Elementor\Controls_Manager::NUMBER,
'min' => 1,
'max' => 5,
'step' => 1,
'default' => 5,
)
);
$this->end_controls_section();
// ── STYLE TAB ────────────────────────────────────────────────
$this->start_controls_section(
'style_section',
array(
'label' => esc_html__( 'Testimonial Style', 'arshadws-widgets' ),
'tab' => \Elementor\Controls_Manager::TAB_STYLE,
)
);
$this->add_control(
'quote_color',
array(
'label' => esc_html__( 'Quote Colour', 'arshadws-widgets' ),
'type' => \Elementor\Controls_Manager::COLOR,
'selectors' => array(
'{{WRAPPER}} .arshadws-quote' => 'color: {{VALUE}};',
),
)
);
$this->add_group_control(
\Elementor\Group_Control_Typography::get_type(),
array(
'name' => 'quote_typography',
'selector' => '{{WRAPPER}} .arshadws-quote',
)
);
$this->add_control(
'author_name_color',
array(
'label' => esc_html__( 'Author Name Colour', 'arshadws-widgets' ),
'type' => \Elementor\Controls_Manager::COLOR,
'selectors' => array(
'{{WRAPPER}} .arshadws-author-name' => 'color: {{VALUE}};',
),
)
);
$this->add_control(
'box_background',
array(
'label' => esc_html__( 'Background Colour', 'arshadws-widgets' ),
'type' => \Elementor\Controls_Manager::COLOR,
'selectors' => array(
'{{WRAPPER}} .arshadws-testimonial-wrap' => 'background-color: {{VALUE}};',
),
)
);
$this->add_responsive_control(
'box_padding',
array(
'label' => esc_html__( 'Padding', 'arshadws-widgets' ),
'type' => \Elementor\Controls_Manager::DIMENSIONS,
'size_units' => array( 'px', 'em', '%' ),
'selectors' => array(
'{{WRAPPER}} .arshadws-testimonial-wrap' => 'padding: {{TOP}}{{UNIT}} {{RIGHT}}{{UNIT}} {{BOTTOM}}{{UNIT}} {{LEFT}}{{UNIT}};',
),
)
);
$this->add_control(
'box_border_radius',
array(
'label' => esc_html__( 'Border Radius', 'arshadws-widgets' ),
'type' => \Elementor\Controls_Manager::SLIDER,
'size_units' => array( 'px' ),
'range' => array(
'px' => array( 'min' => 0, 'max' => 40 ),
),
'selectors' => array(
'{{WRAPPER}} .arshadws-testimonial-wrap' => 'border-radius: {{SIZE}}{{UNIT}};',
),
)
);
$this->end_controls_section();
} // end register_controls()
protected function render() {
$settings = $this->get_settings_for_display();
$quote = $settings['quote'];
$author_name = $settings['author_name'];
$author_role = $settings['author_role'];
$image = $settings['author_image'];
$rating = (int) $settings['star_rating'];
if ( empty( $quote ) ) {
return;
}
$output = '<div class="arshadws-testimonial-wrap">';
// Star rating
if ( $rating ) {
$aria_label = sprintf( '%d out of 5 stars', $rating );
$output .= '<div class="arshadws-stars" aria-label="' . esc_attr( $aria_label ) . '">';
for ( $i = 1; $i <= 5; $i++ ) {
$star_class = ( $i <= $rating ) ? 'filled' : 'empty';
$output .= '<span class="arshadws-star ' . esc_attr( $star_class ) . '">★</span>';
}
$output .= '</div>';
}
// Quote
$output .= '<blockquote class="arshadws-quote">';
$output .= wp_kses_post( $quote );
$output .= '</blockquote>';
// Author row
$output .= '<div class="arshadws-author">';
if ( ! empty( $image['url'] ) ) {
$output .= '<div class="arshadws-author-photo">';
$output .= '<img src="' . esc_url( $image['url'] ) . '"';
$output .= ' alt="' . esc_attr( $author_name ) . '"';
$output .= ' width="56" height="56" loading="lazy">';
$output .= '</div>';
}
$output .= '<div class="arshadws-author-info">';
if ( ! empty( $author_name ) ) {
$output .= '<strong class="arshadws-author-name">' . esc_html( $author_name ) . '</strong>';
}
if ( ! empty( $author_role ) ) {
$output .= '<span class="arshadws-author-role">' . esc_html( $author_role ) . '</span>';
}
$output .= '</div>'; // .arshadws-author-info
$output .= '</div>'; // .arshadws-author
$output .= '</div>'; // .arshadws-testimonial-wrap
echo $output; // phpcs:ignore WordPress.Security.EscapeOutput.OutputNotEscaped
} // end render()
} // end class ArshadWS_Testimonial_Widget
Step 8: Activate and Test
- Upload the entire
arshadws-elementor-widgets/folder towp-content/plugins/ - Go to WordPress Dashboard → Plugins → Activate your new plugin
- Open any page in Elementor and search for “AW Testimonial” in the widget panel — it appears under General
- Drag it onto the canvas, fill in the controls in the sidebar, and confirm the live preview updates correctly
- Switch to the frontend and confirm stars, quote, photo, name, and role all render correctly
- Test on mobile and tablet using Elementor’s responsive preview mode
Elementor Widget Best Practices for 2026
- Always build inside a standalone plugin — never functions.php: A plugin persists across theme changes. Functionality in functions.php disappears the moment a client switches themes.
- Always escape every output value: Use
esc_html(),esc_url(),esc_attr(), andwp_kses_post()for every value before it reaches the page. Unescaped output is the most common security vulnerability in custom Elementor widgets. - Use
get_settings_for_display()— notget_settings(): The display version applies Elementor’s dynamic tag processing, making your widget compatible with ACF fields and dynamic data sources. - Use
add_responsive_control()for all spacing and sizing: This automatically generates desktop, tablet, and mobile variants of any dimension control. - Declare assets with
get_style_depends(): This tells Elementor to load your CSS only on pages where the widget is used — every other page stays fast. - Prefix all class names and function names: Use a unique prefix like
arshadws_everywhere to prevent conflicts with other plugins and Elementor’s own widget namespace. - Save as UTF-8 without BOM: A BOM character at the top of a PHP file causes header output errors that break plugin loading. Always check your editor’s encoding settings.
- Test after every major Elementor update: The Elementor API occasionally introduces changes that require small updates to custom widgets. Subscribe to the Elementor developer changelog and test widgets after every major release.
Conclusion: Custom Elementor Widgets Are a Premium Service Offering
Elementor is active on over 15 million WordPress websites globally, and the ability to build custom widgets is one of the most profitable skills a WordPress developer can have in 2026. For freelance developers, custom Elementor widget development is one of the clearest ways to differentiate from developers who only configure existing tools — and to justify premium project rates.
A custom widget built correctly — with clean controls, proper escaping, responsive style controls, and conditional asset loading — delivers functionality that no third-party addon can replicate for your client’s specific use case. And once you have built your first widget, the same framework applies to every widget you build after it.
At ArshadWebStudio, we build custom Elementor widgets as part of every WordPress development project — giving clients bespoke, reusable components that fit their exact content model and design system. If you need a custom Elementor widget built for your WordPress site, get in touch today.
About the Author
Arshad Shah is a freelance WordPress and Shopify developer at arshadwebstudio.com, specialising in custom Elementor widget development, WordPress plugin architecture, WooCommerce, and performance optimisation. He builds bespoke, client-specific WordPress components that go beyond what any off-the-shelf addon can deliver.
Comments
No comments yet. Be the first to share your thoughts!
Leave a Comment